Using The Addon
The PostPro Panel is available in the Side Panel under the True-VFX Tab

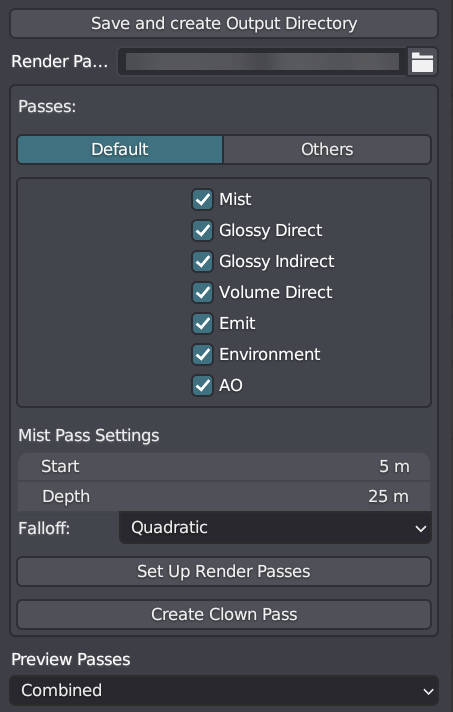
Save and Create Output Directory: Click this button to create a render pass directory for the project in the directory specified in the addon preferences. If your blend file is not saved, it will prompt you to enter a name and save the blend file. Saving the file is necessary for the addon to work, as it requires a path to save all the render passes. Once clicked, the render passes directory path will be displayed below the button. You can open this path by pressing the button next to it while holding down Shift.
Passes: Select the passes you want to render out. The addon provides default passes that you can set in the addon preferences. If you need additional passes, switch to the "Others" tab and select the desired passes.
The available passes will depend on the render engine you are using.


Mist Pass Settings: This section appears when the mist pass is enabled. Here, you can configure the mist settings.

Setup Render Passes: This is the main button to press after selecting your passes. It enables all the selected passes and sets up the compositor with new nodes to automatically save the passes when you render.
Create Clown Pass: The Clown pass is similar to a cryptomatte. Click this button to save the clown pass in the render passes directory.
Preview Pass: You can preview certain passes in the viewport. The available passes will depend on the render engine you are using.
By following these steps, you can effectively use the PostPro addon to manage and render various passes for your projects. It provides a convenient way to save and organize render passes, customize settings, and preview passes directly in the viewport.
